
PRO ADVICE
Getting the basics right
What makes a good photographer ? Well lots of things but the good advice that I got many years ago was just get out there and shoot.. as much as possible. Good advice indeed, but if you really want to start thinking like a “photographer” instead of just a “happy snapper” then learn and get to grips with the basics.
Exposure – Aperture / Shutter speed / ISO… the fundamental principles. All three combine to control the exposure each time you hit the button , how much light… how long that light will expose for and how sensitive the sensor (or film ) is to light . Too much and it’s blown out or over exposed, too little and its way too dark.
Sure you can just shoot on auto and let the camera figure it all out, but what will you learn if you never try and figure these things out by yourself… ?
By learning to shoot in manual you can fine tune that exposure using aperture ( quantity of light ) or shutter speed ( how long that light exposes for ). Both of these also posses creative possibilities, Aperture – depth of field and shutter speed controls time or movement. Adjusting the ISO lets you elect custom vales of both of these so you have full creative control of the medium you are working with – LIGHT.
Remember the camera’s meter is not 100% accurate , it’s calibrated to produce an average result (mid or 18% grey as its known) which it does pretty well, but more often than not it is not the correct exposure .. that is your decision.
The correct exposure is also a creative choice, again your choice.
Example – Namibia Dunes at dusk
Shooting in manual exposure mode allows you to master the exposure of each image that you take. For example setting the ISO to a minimum vale of 100 minimises noise and nasty pixels in the shadows. Then I’d select my aperture, in the example below I need around f11 or a decent depth of field ( front to back sharpness ). Then using the camera’s meter as a guide I dial the shutter speed to get the cursor to the centre just as the camera does in auto.
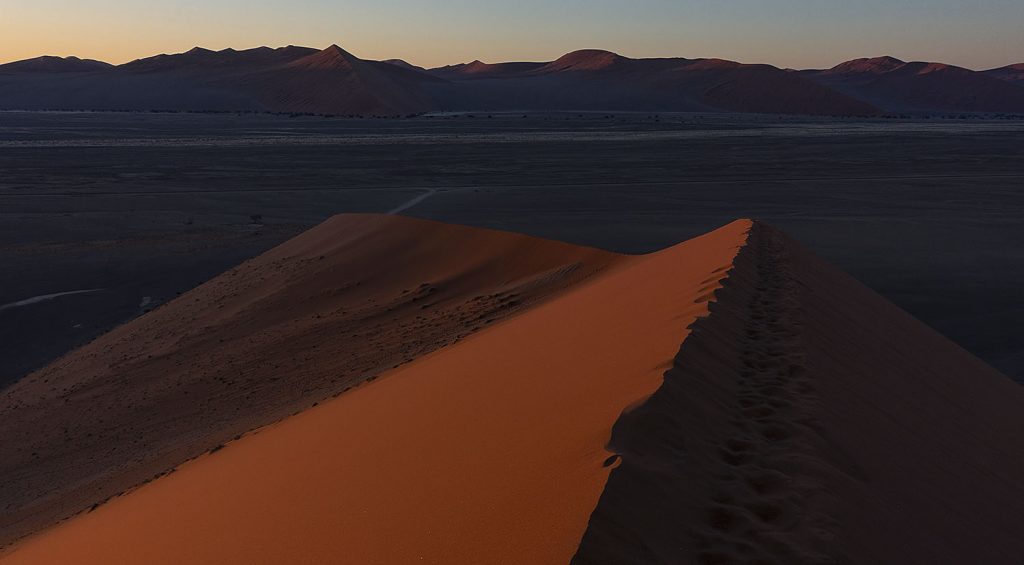
Next shutter speed, the camera is tripod mounted so it doesn’t matter how low the shutter speed goes, camera shake is zero. I make an exposure, then evaluate the result with the LCD screen first, then bring up the Histogram. The majority of the image is in shadow… so the camera’s metering compensates by over exposing to give an average. The resultant image would be predominantly light as the meter has by default tried to set an average. The meter doesn’t know what the main feature or subject is and I want to hold the shadow detail so I manually compensate by adjusting the shutter speed (increasing it.. lets less light in) to darken or underexpose the image. This result shows enough detail in the shadows, the highlight detail in the sky and the detail in the mid-tones, the lit side of the dunes.
Thats it, manual exposure based on my creative choice. It might sound confusing but once you’ve attempted this a few times it makes sense. Over time it will become second nature and your images will improve as your now taking creative control of the exposure process. Practice Practice.
Lens choice – which focal lengths ?
So many options, so many choices. I like to keep things simple so I only normally carry 3 lenses for my landscape work.
What subject(s) are in front of me and how much of said subjects I want to compose in the frame dictates what lens I use. If I’m close to ( standing near ) interesting elements within the scene and I want include several elements including a background, I usually opt for a wide angle lens.
A 16-35mm f4 VR Nikon wide angle zoom For wide angle work and creative compositions that usually incorporate a foreground and middle ground and a background.
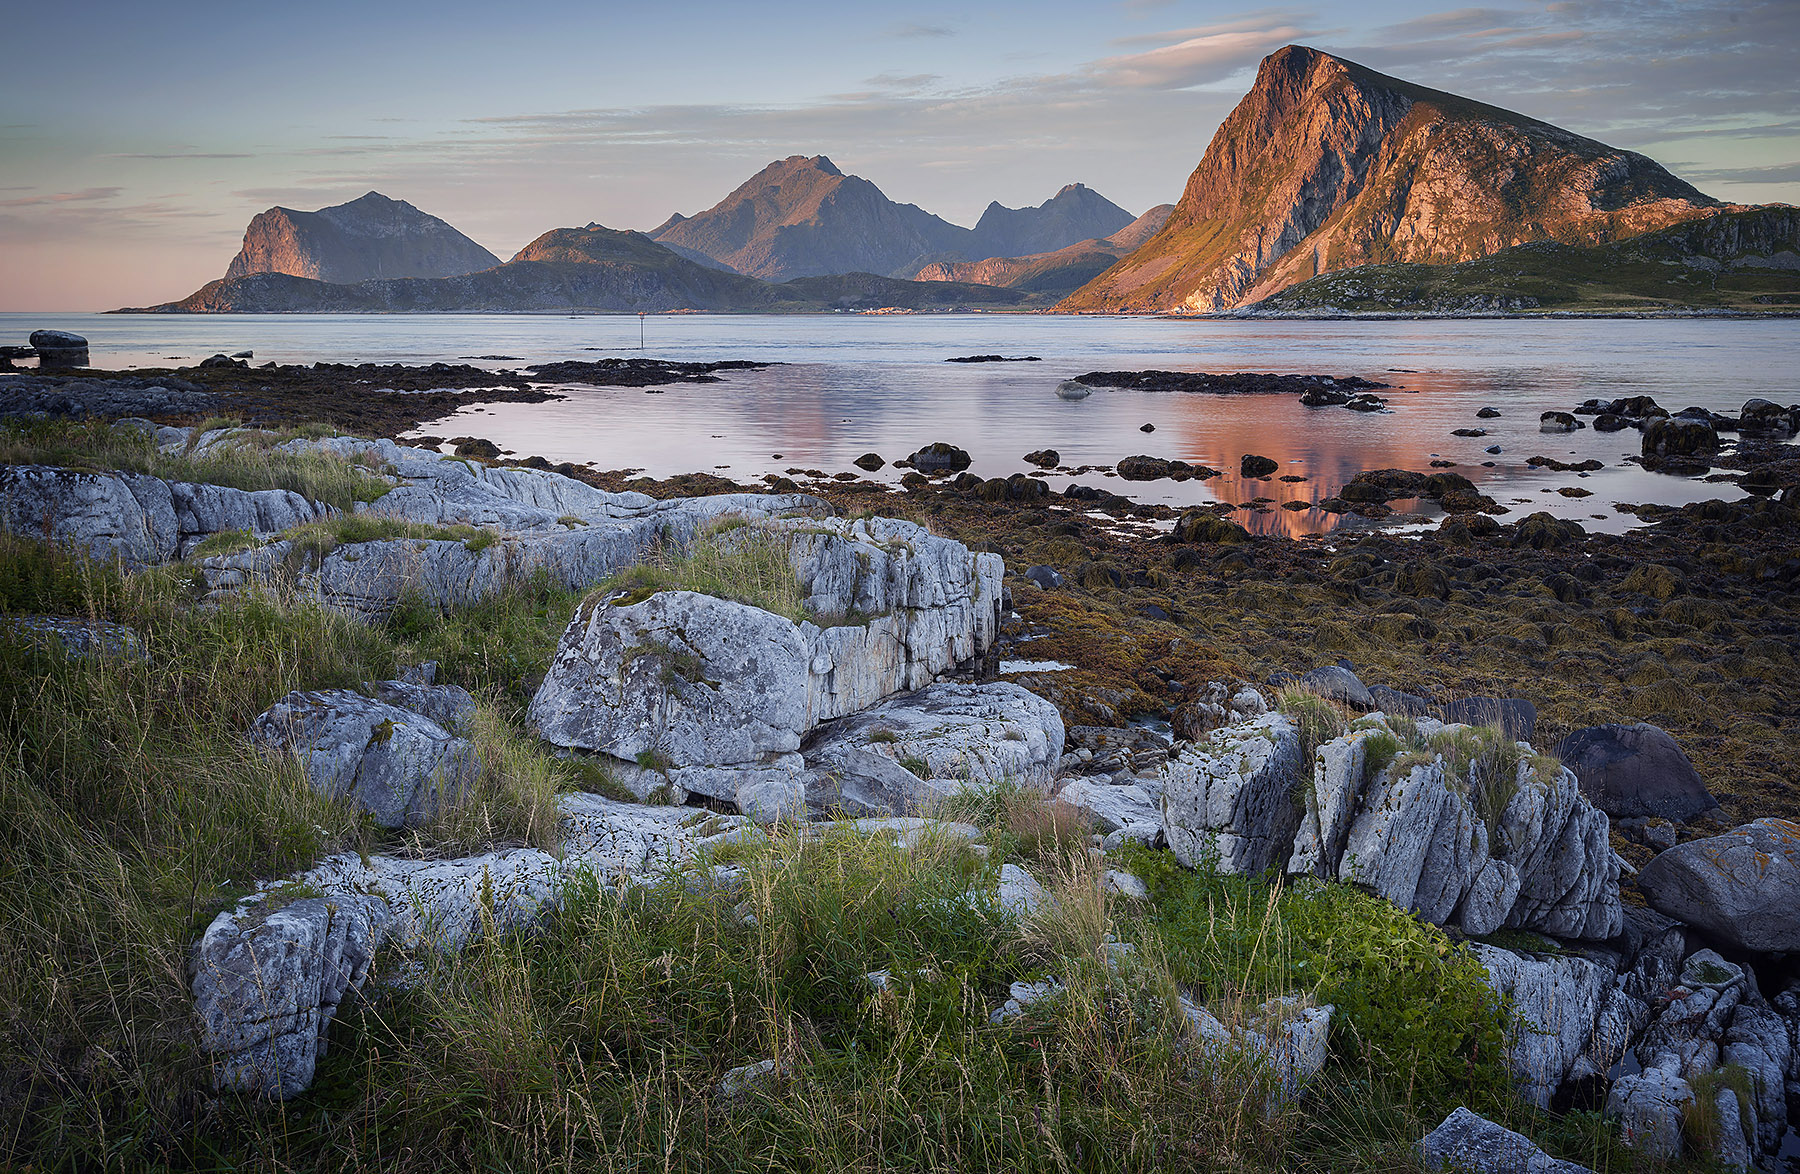
The image above from Norway’s Lofoten Islands incorporates foreground rocks in cool shadows and in the middle ground some more cooler rocks, seaweed and semi submerged rocks. The background features a band of mountains bathed in warm sunlight. A wide angle lens allows me to gather up these 3 layers of elements, placing them through the frame thus creating depth in the photograph. Taken with an aperture of f13 it gives me a deep depth of field – rendering all the subject sharp through the photograph front to back.
A 50mm f1.8 is my lens of choice if its more of a true perspective I want, (a wide angle will distort closer elements and makes distant elements seem smaller and pushes them further away) then I opt for a 50mm prime. Its light, very sharp and my legs can do the zooming by moving closer or a little further back. Its also good for portraits and small buildings such as old ruins as it deist distort features or converge verticals as a wide angle would do if tilted up or down.
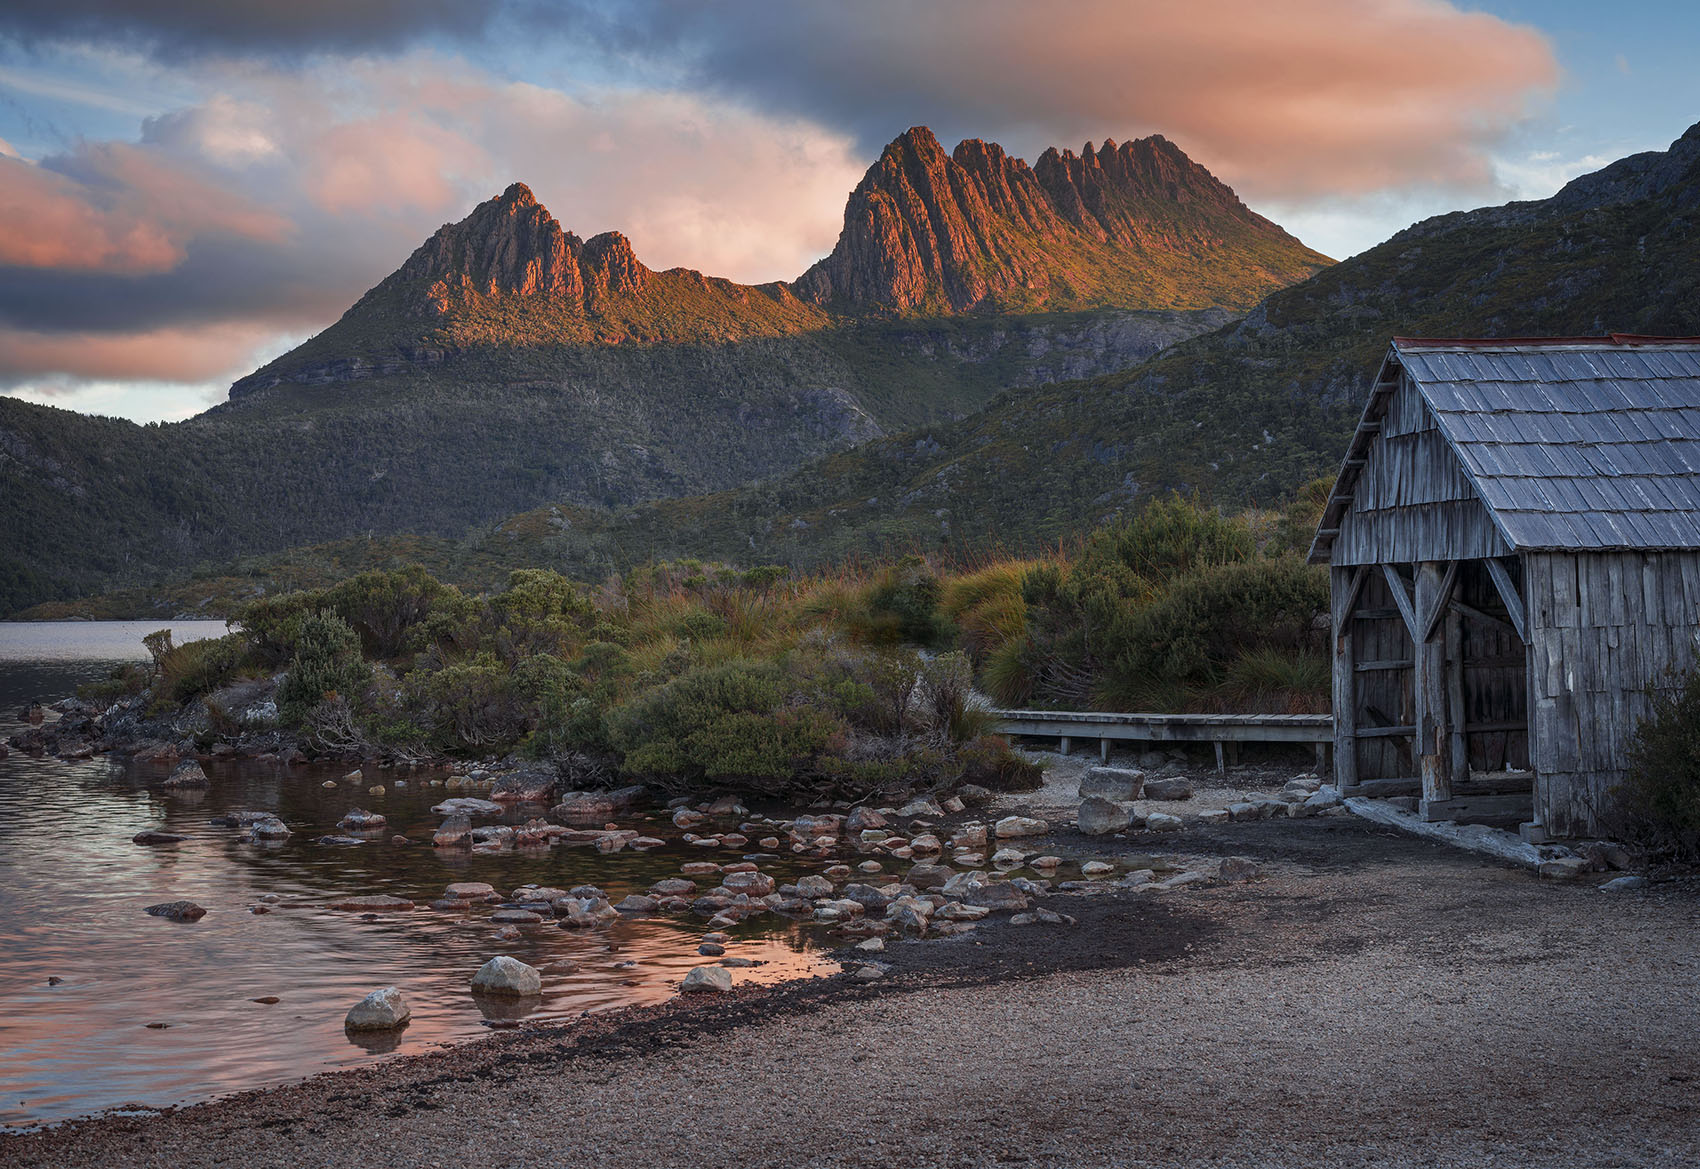
This image of Tasmania’s Cradle mountain was taken with a 50mm prime. It still incorporates some foreground beach, the boat shed and the mountain itself in the background. The perspective is fairly accurate in that all the elements relate to each other almost as they do in reality. It was taken at chest height, as to avoid tilting the camera up or down which avoids converging the vertical lines of the boathouse on the edge of the frame.
Yes there are specialised tilt-shift lenses available that shoot wider and control verticals , but these are added weight and added cost.
A 70-200mm f2.8 telephoto zoom is the third key lens that I carry. Telephoto’s isolate part of the visible scene that you are taking in bringing elements closer to the photographer than might appear in reality. Picking out interesting parts of the landscape or cityscape as to point out specific feature of a scene. No foreground gets a look in as the scene is cropped and composed by the photographer. The light that travels through the lens is compressed giving flattened feel to the elements, working in its favour to give an often abstract feel.
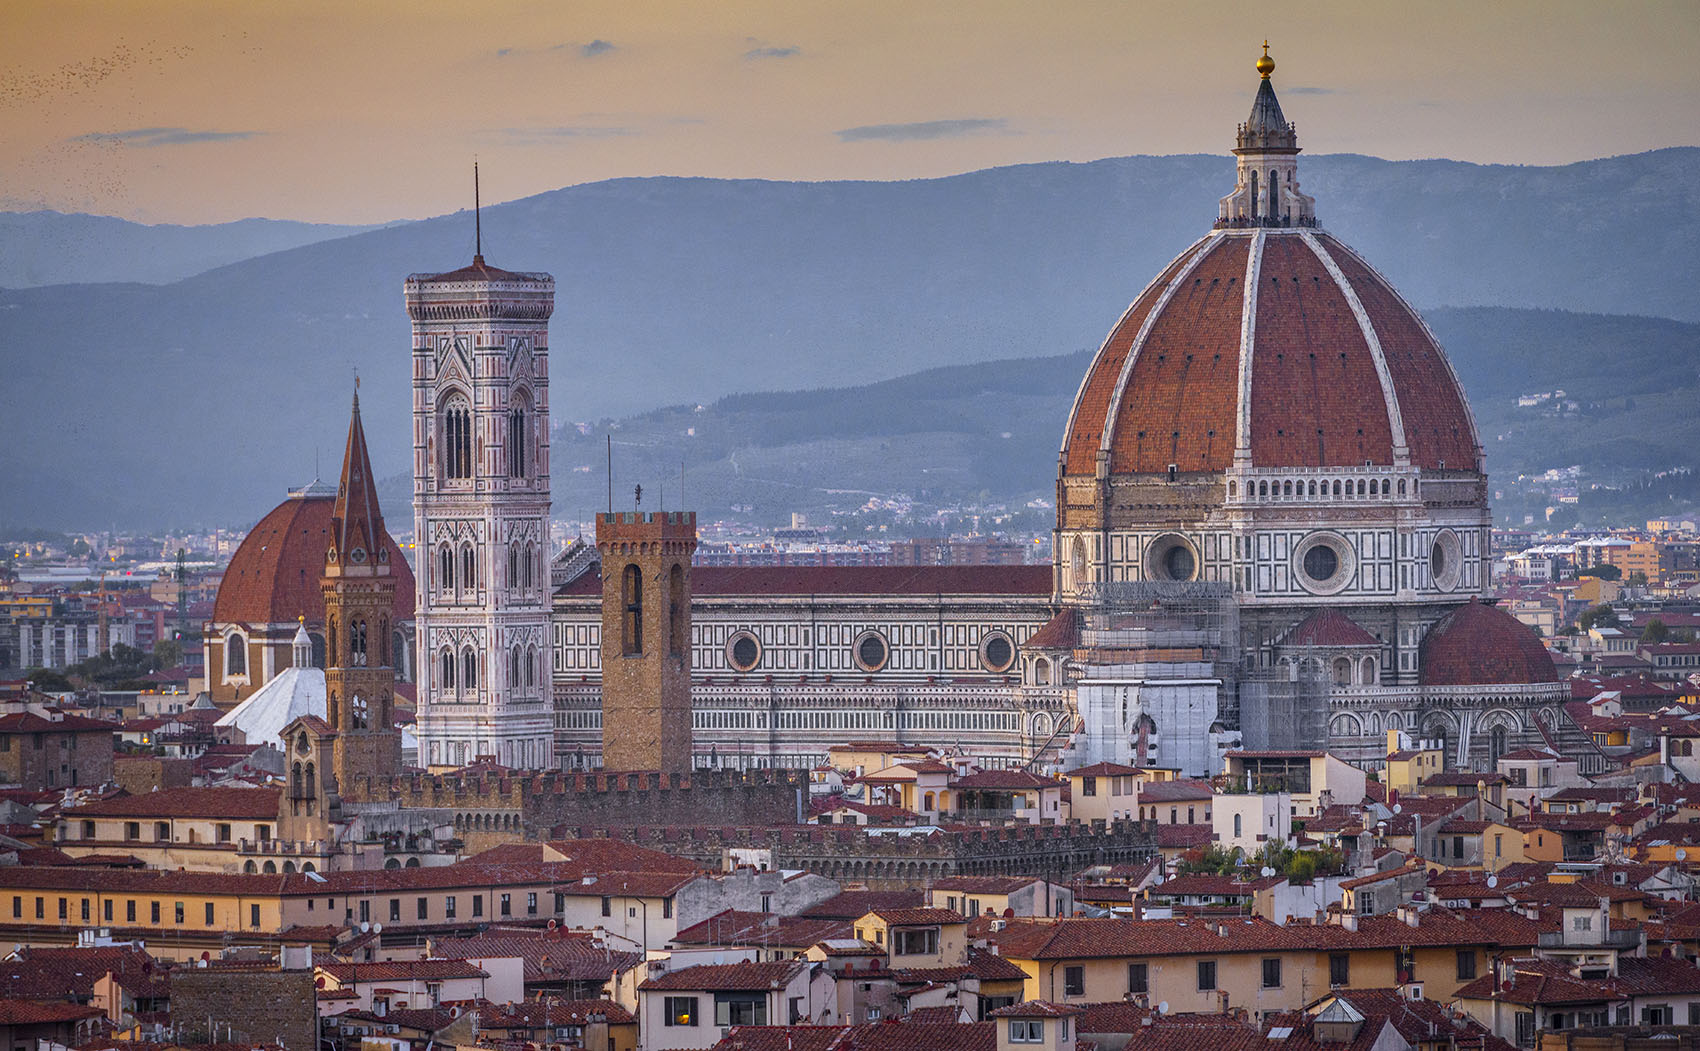
This image of Florence’s Duomo was taken from the Piazzale Michelangelo which lies at least a kilometre away. The lens was set to 200mm focal length thus isolating the building with just a few other structures surrounding it, which gives it a sense of scale and how it relates to its surroundings. Notice how the space between the buildings is compressed as are the layers of mountains in the back ground.
So depending where you are in relation to your subject, what the subjects are and which you intend to leave in and leave out will then determine which lens you choose to use. I suggest you experiment and use all focal lengths in some situations to give a better understanding of how the work and the results they produce.
Specialist lenses
There are also other specialist lenses available that you can incorporate into your kit such as Macros for close up work, super telephotos up to 600mm for wildlife and sports, tilt – shift for architecture and specialist ultra sharp primes for super high quality resolving power. These all cost money and add weight to your kit, so if your on the move and like to travel light you need to consider these factors and whether its worth the investment.
The ones you do decide to buy, get best lenses you can afford , camera technology changes fast but lenses tend to have a much longer user lifetime.
If this has whet your appetite to learn more then why not book a practical one to one session with Glen or join a small group workshop on location. Begin your own photography journey with practical sessions at inspiring locations.
 Glen Campbell. Tel +44 (0)782 637 0271 | All images contained on this site are subject to ©GCCP 2009-2018. All rights reserved.